A Guide to Safe A2L Charging Installation
Navigating the world of refrigerants can sometimes feel like you need a special decoder ring, especially with the introduction of new classifications. If you’ve found yourself staring at an A2L cylinder and wondering if you need a hazmat suit, you’re not alone. The shift towards mildly flammable (A2L) refrigerants is a significant step for the HVACR industry, driven by environmental goals to phase down high-GWP HFCs.
But with new regulations come new procedures. This guide is here to walk you through the process of a safe A2L charging installation. We’ll break down the necessary steps, the tools you’ll need, and the safety precautions that will keep you, your team, and your customers safe. Think of this as your friendly manual for handling these new refrigerants without causing any unintended fireworks. By the end, you’ll be able to confidently and competently perform an A2L charging installation, ensuring both compliance and peace of mind.
Understanding A2L Refrigerants First
Before we get our hands dirty, let’s have a quick refresher on what A2L refrigerants are. The “A” means they are non-toxic, and the “2L” signifies they are “mildly flammable.” This is a key distinction from highly flammable A3 refrigerants like propane. A2L refrigerants, such as R-32, R-454A, and R-454B, have a lower flammability and are harder to ignite. They also have a low burning velocity, meaning if they do ignite, the flame spreads slowly and is typically easy to extinguish.
The main reason for their adoption is their significantly lower Global Warming Potential (GWP) compared to the HFCs they are replacing, like R-410A. This makes them a more environmentally friendly choice, aligning with global regulations like the Kigali Amendment to the Montreal Protocol. So, while you do need to take extra precautions, you’re also doing your part for the planet.
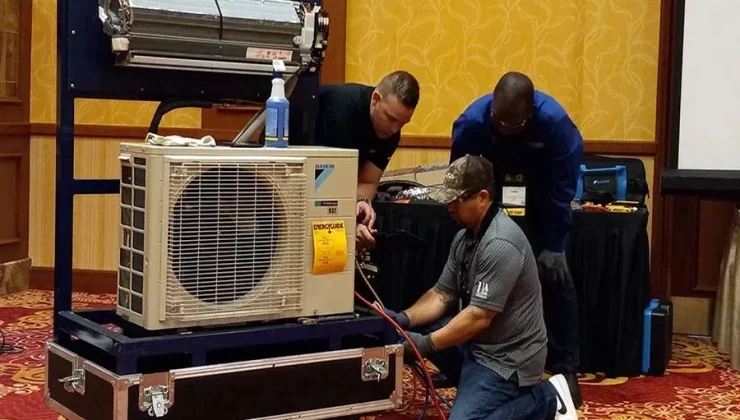
Essential Tools for the Job
Performing an A2L charging installation requires some specific equipment designed for flammable refrigerants. Using your old, standard tools might not just be non-compliant; it could be dangerous. Here’s a checklist of the gear you’ll need to have on hand:
- A2L-Compatible Recovery Machine: This is non-negotiable. These machines have spark-proof components to prevent ignition.
- A2L-Rated Vacuum Pump: Similarly, your vacuum pump must be certified for use with A2L refrigerants to eliminate ignition sources.
- Electronic Refrigerant Leak Detector for A2Ls: Your standard leak detector might not be sensitive enough or safe for A2Ls. You need one specifically designed to detect these refrigerants.
- Digital Manifold Gauge Set: While not strictly required to be A2L-specific, a quality digital set provides more accuracy, which is crucial for charging.
- Ventilation Fans: Good ventilation is your best friend. Portable, explosion-proof fans are ideal for ensuring any leaked refrigerant is safely dispersed.
- Left-Hand-Threaded Cylinders and Adapters: A2L cylinders have a left-hand thread (reverse thread) to prevent accidental connection of non-A2L equipment. Make sure you have the correct hoses and adapters.
- Personal Protective Equipment (PPE): This includes safety glasses and gloves, as always.
- A Dry Chemical Fire Extinguisher: Keep one nearby, just in case. It’s a simple precaution that can make a world of difference.
Having the right tools isn’t just about following the rules; it’s about creating a safe working environment for yourself and everyone around you.
Step-by-Step A2L Charging Installation Guide
Alright, with the theory and tools sorted, let’s get into the practical steps for a safe and effective A2L charging installation.
Step 1: Assess the Work Area
Before you even think about connecting a cylinder, take a good look at your surroundings. The primary goal is to prevent any potential refrigerant leaks from accumulating and finding an ignition source.
- Identify and eliminate ignition sources. This includes open flames, sparks from electrical equipment, and even static electricity. Turn off any nearby pilot lights or non-essential electrical devices.
- Ensure adequate ventilation. If you’re indoors, open windows and doors. Set up your ventilation fans to create a steady airflow across the work area, directing any potential leaks outside. This is one of the most effective ways to mitigate risk.
- Post warning signs. Let others know that you are working with a flammable substance. A simple sign can prevent someone from unknowingly creating a hazard.
Step 2: System Pressure Test and Evacuation
This step is standard for any refrigerant installation but is even more critical with A2Ls. A leak isn’t just an environmental concern anymore; it’s a safety hazard.
- Pressurize the system with dry nitrogen to check for leaks. Use your electronic leak detector to thoroughly inspect all joints and connections.
- Once you’ve confirmed the system is tight, release the nitrogen and perform a deep evacuation. Use your A2L-rated vacuum pump to pull the system down to at least 500 microns. A deep vacuum removes non-condensables and moisture, which is vital for system efficiency and longevity.
- Let the system stand for a while after evacuation to ensure it holds the vacuum, confirming there are no leaks.
Step 3: Charging the System
Now for the main event. Remember those left-hand-threaded cylinders? This is where they come into play.
- Connect your manifold gauges and hoses to the system and the A2L refrigerant cylinder. Ensure all connections are tight.
- Purge the hoses with a small amount of refrigerant to remove any air or contaminants.
- Charge the system with liquid refrigerant. For zeotropic blends like R-454B, it’s essential to charge as a liquid to maintain the correct composition. Charge by weight using a digital refrigerant scale, following the manufacturer’s specifications for the required charge amount. Do not guess.
- Once the correct charge is added, close the cylinder valve and disconnect your hoses.
Step 4: Final Checks and Cleanup
The job isn’t done until you’ve double-checked your work and left the site safe.
- Perform a final leak check around all service ports and connections you accessed.
- Properly label the system. The equipment should be clearly marked, indicating it contains an A2L refrigerant. This is crucial for future servicing.
- Secure the area. Remove your warning signs, pack up your tools, and ensure the workspace is clean and safe.
Your Role in a Safer Industry
Adopting A2L refrigerants is a collective effort towards a more sustainable HVACR industry. While the “mildly flammable” label might sound intimidating, proper training, the right tools, and a meticulous approach make the A2L charging installation process just as safe as working with traditional A1 refrigerants.
Remember that every time you follow these procedures, you’re not just completing a job. You are contributing to a culture of safety and professionalism that protects technicians, customers, and the environment. It’s about taking pride in your craft and adapting to new technologies responsibly. So, embrace the change, gear up correctly, and continue delivering the high-quality service your customers expect.